

You finally invested in a set of reusable silicone beauty patches, and after just a few uses, they’re already losing their grip or causing tiny breakouts along your cheekbones. Sound familiar? The frustrating truth is that most people skip or rush the cleaning step, and that single habit is what kills patch performance faster than anything else. This guide walks you through exactly how to clean your beauty patches properly, what products are safe to use, and how to keep both your skin and your patches in great shape for the long haul.
Table of Contents
- What you need to clean beauty patches
- Step-by-step: How to clean your beauty patches
- Troubleshooting: Common mistakes and how to fix them
- Comparison: Daily vs deep cleaning routines
- How to know your patches are clean and ready
- An expert perspective: Why consistent patch care actually matters
- Next-level patch care: Make cleaning easy and effective
- Frequently asked questions
Key Takeaways
| Point | Details |
|---|---|
| Clean after every use | Washing your beauty patches immediately prevents build-up and irritation. |
| Avoid harsh chemicals | Never use alcohol or bleach to clean patches, as it ruins adhesive and silicone. |
| Choose the right routine | Use a quick clean daily and a deep clean periodically for lasting results. |
| Check patch readiness | A clean patch will look clear, feel sticky, and show no film or debris. |
| Proper storage matters | Storing patches in a clean system protects them between uses and extends their life. |
What you need to clean beauty patches
Having the right supplies before you start makes the whole process faster and safer. You don’t need a cabinet full of specialty products. A few simple, gentle items are all it takes to keep your silicone patches performing like new.
Safe cleaning tools and materials:
- Mild, fragrance-free facial cleanser or baby soap
- Lukewarm water (not hot)
- Clean fingertips or a very soft cloth
- A lint-free towel for initial patting
- A ventilated surface or drying rack for air drying
What to absolutely avoid:
- Rubbing alcohol or isopropyl alcohol
- Bleach or bleach-based wipes
- Harsh exfoliating cleansers or scrubs
- Makeup wipes with added fragrance or oil
- Paper towels (they leave fibers on the adhesive surface)
Here’s a quick reference so you can check your cleaning products at a glance:
| Product type | Safe to use? | Why it matters |
|---|---|---|
| Mild baby soap | Yes | Gentle on silicone and adhesive |
| Fragrance-free cleanser | Yes | Won’t break down the adhesive layer |
| Rubbing alcohol | No | Degrades silicone and kills stickiness |
| Bleach or disinfecting wipes | No | Damages adhesive, risks skin irritation |
| Oil-based makeup remover | No | Leaves residue that ruins grip |
| Micellar water (alcohol-free) | Generally yes | Check label for alcohol content first |
“Community and brand guidance generally focuses on cleaning after each use; some guides also suggest periodic disinfection or extra cleaning, but always follow silicone-safe and adhesive-safe recommendations and avoid alcohol and bleach.”
Before you start cleaning, it’s also worth checking the manufacturer’s label or product page for any specific instructions. Some brands have their own guidance on what’s safe for their particular adhesive formula. You can also review patch safety info to understand what materials your patches are made from and which cleaners are compatible.
Pro Tip: If you’re unsure whether a cleanser is safe, do a quick patch test on a corner of one silicone piece before cleaning the whole set.
Step-by-step: How to clean your beauty patches
With the right supplies in hand, follow these straightforward steps every time you use your patches. Consistency here is everything. A quick, gentle clean after each session takes less than two minutes and dramatically extends how long your patches stay effective.
-
Rinse immediately after removal. Hold the patch under lukewarm running water right after you peel it off. This loosens any serum, moisturizer, or skin oils before they have a chance to set into the adhesive.
-
Apply a small amount of mild soap. Use just a drop of fragrance-free cleanser on your fingertip. Gently work it across the entire surface of the patch, including the adhesive side, using light circular motions.
-
Rinse thoroughly. Run the patch under clean water until every trace of soap is gone. Soap residue left on the adhesive is one of the top reasons patches stop sticking properly.
-
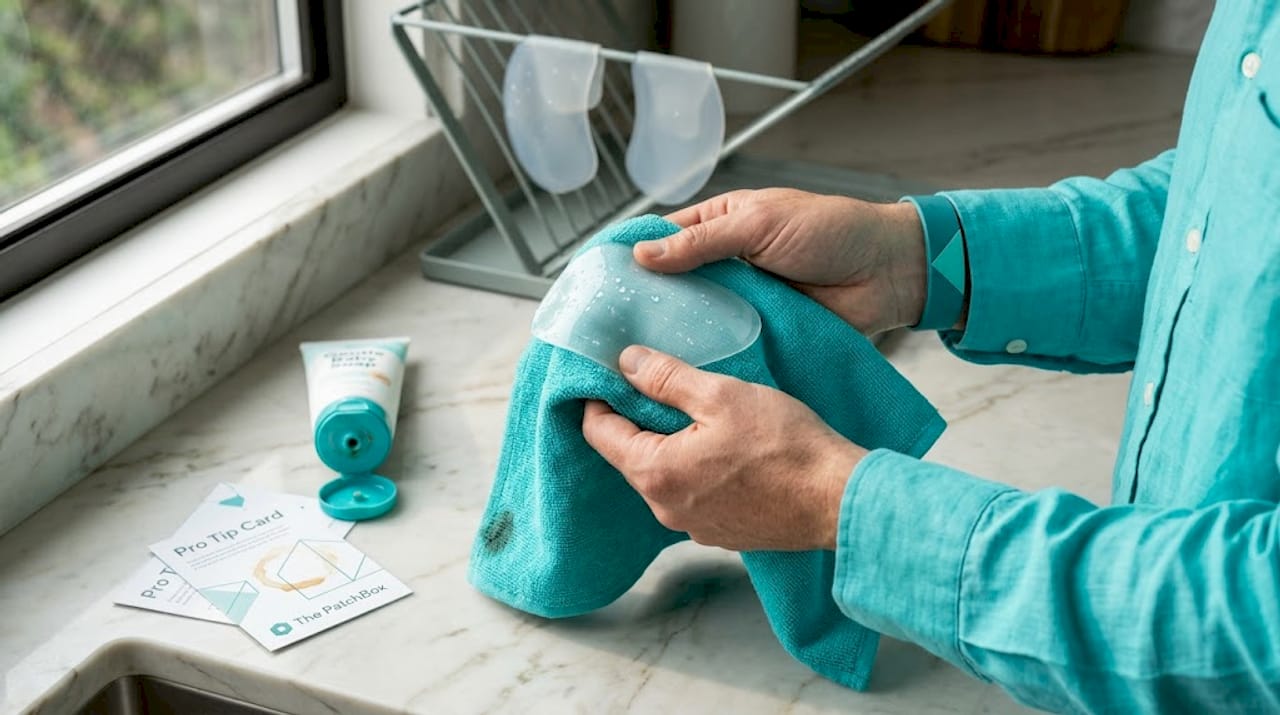
Pat gently, then air dry. Lightly pat the non-adhesive side with a lint-free cloth to remove excess water. Then lay the patch adhesive-side up on a clean, ventilated surface and let it air dry completely before storing.
-
Store properly once dry. Never fold or stack wet patches together. Once fully dry, place them in a clean, organized system that keeps them flat and separated.
The ongoing patch care routine matters as much as the cleaning itself. Skipping even one step, like not rinsing out all the soap, can create a film that builds up over time and permanently reduces stickiness. Cleaning after every single use is the standard that most brands and beauty communities recommend, and it genuinely makes a measurable difference in how many uses you get out of each patch.
Pro Tip: Never use hot water. Heat can warp the silicone shape over time and weaken the adhesive bond. Lukewarm is always the right temperature.
Troubleshooting: Common mistakes and how to fix them
Even with a good routine, problems can pop up. Here’s how to sidestep the most common cleaning pitfalls and what to do if your patches are already showing signs of wear.
The top three mistakes people make:
- Not cleaning after every use. Skipping even one session allows skin oils, serum residue, and bacteria to bond more deeply with the silicone. Once that happens, it’s much harder to restore full stickiness.
- Scrubbing too hard. Aggressive rubbing tears tiny grooves into the silicone surface and permanently damages the adhesive layer. Gentle circular motions with a fingertip are all you need.
- Using harsh chemicals. This is the biggest one. Beauty communities consistently flag that you should avoid alcohol and bleach when cleaning beauty patches, because these strip the adhesive coating and can cause skin irritation on your next use.
“Using the wrong cleaners doesn’t just damage your patches. It can leave chemical residue on the adhesive surface that transfers directly to your skin during your next application.”
How to recover lost stickiness:
If your patches feel less grippy than they used to, try a gentle soak in lukewarm water with a tiny drop of baby soap for about 30 seconds, then rinse very thoroughly. Sometimes a film of product residue is the culprit, and this extra rinse step can help restore some of the original tack. If the stickiness doesn’t return after a thorough clean, the adhesive layer may be permanently compromised and it’s time to replace that patch.
Dealing with odor:
A mild, persistent smell usually means bacteria have been building up between uses. This is a sign that your cleaning routine needs to be more consistent. Clean patches immediately after removal rather than leaving them sitting overnight before washing.
Investing in dedicated patch storage that keeps patches separated, ventilated, and away from dust or other products can also prevent odor from developing in the first place.
Pro Tip: If your patches develop a sticky, tacky feel that wasn’t there before, it may be a sign of product buildup rather than the original adhesive. A thorough rinse often resolves this within one or two cleaning cycles.
Comparison: Daily vs deep cleaning routines
Wondering if your cleaning routine needs an upgrade? Let’s compare the two key approaches to beauty patch care so you can decide what works best for your lifestyle.
| Feature | Daily quick clean | Periodic deep clean |
|---|---|---|
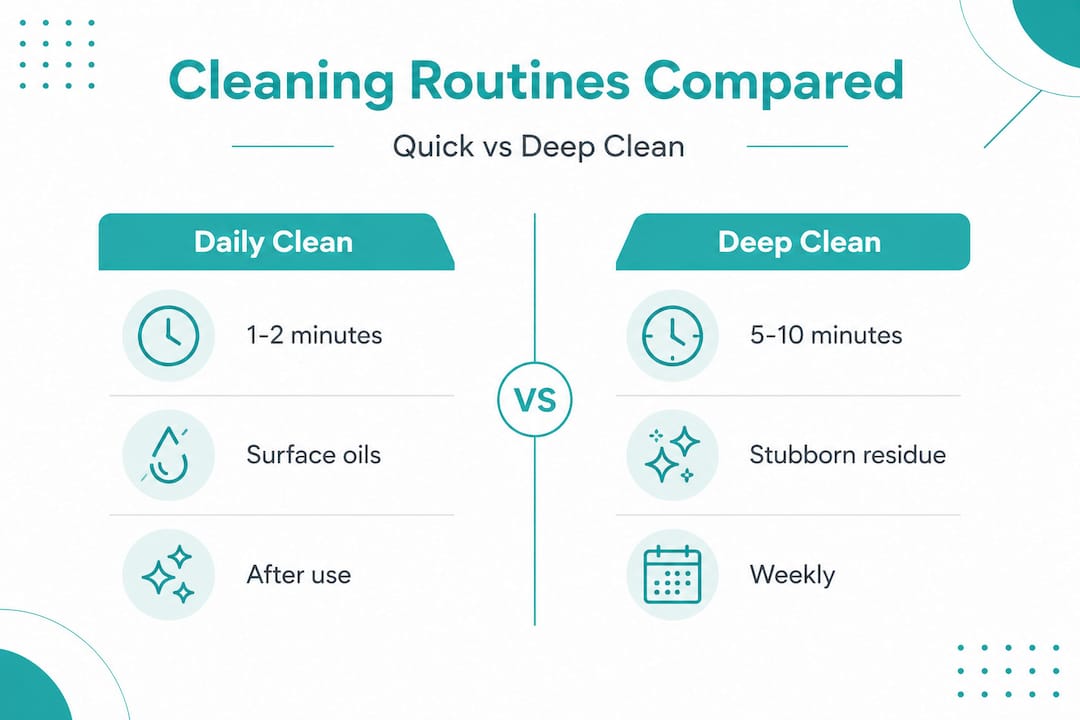
| Time required | 1 to 2 minutes | 5 to 10 minutes |
| Frequency | After every single use | Every 1 to 2 weeks |
| Tools needed | Mild soap, water, fingertips | Soak bowl, soft cloth, mild soap |
| Best for | Removing surface oils and serums | Tackling residue build-up and odor |
| Skin safety | High, when done correctly | High, if using safe products only |
| Patch longevity impact | Very high | Moderate boost on top of daily care |
The daily quick clean is your foundation. It’s what keeps patches functional use after use without any dramatic effort. Most beauty communities and brands suggest periodic disinfection or extra cleaning on top of daily care, but only when using silicone-safe and adhesive-safe methods.
When to do a deep clean:
- When you notice the patch feels slightly tacky or looks slightly cloudy after your usual rinse.
- After using a particularly heavy serum or oil-based product the night before.
- If you’ve been sick and want to make sure surfaces are extra clean before reuse.
- Every one to two weeks as a maintenance habit, even if patches look fine.
How to choose your approach:
If you’re someone who uses patches every night, daily cleaning is non-negotiable. The deep clean is your backup, not your primary method. Think of it like washing your face: you do it every day with your regular cleanser, and occasionally you might do a clay mask for extra clearing. Same logic applies here.
You can find more practical patch care tips to help you build a routine that fits your schedule without feeling like extra work.
How to know your patches are clean and ready
Now that you know how to clean and care for them, here’s how to be sure your patches are truly ready to reuse. A patch that looks clean isn’t always clean, and a patch that feels sticky isn’t always ready.
Visual and tactile checks to run before reuse:
- No visible residue. Hold the patch up to natural light. There should be no white film, oily sheen, or makeup traces on either side.
- Smooth, consistent surface. The adhesive side should feel uniformly tacky, not patchy or rough in certain areas.
- No cloudiness. Clear silicone patches should remain transparent. Cloudiness often signals product build-up or early silicone degradation.
- No unusual smell. A clean patch should be odorless. Any lingering scent suggests it needs another wash.
- Flat, unwarped shape. If the edges have started to curl or the patch has changed shape, the silicone may have been exposed to heat or stored incorrectly.
“Following manufacturer guidelines to ensure patches are cleaned properly for reuse is the most reliable way to protect both the product and your skin.”
When to replace instead of clean:
Some patches simply reach the end of their useful life, and no amount of cleaning will bring them back. Replace a patch when the adhesive no longer grips after a thorough clean, when the silicone shows visible tears or thinning, or when you notice consistent skin irritation that wasn’t there before. Holding onto a compromised patch isn’t worth the risk to your skin.
You can also check material safety details to understand the typical lifespan and care expectations for different silicone patch formulations.
An expert perspective: Why consistent patch care actually matters
Here’s something most patch guides skip over entirely: caring for your patches isn’t just about protecting a product. It’s about protecting your skin barrier, your investment, and the results you’re working toward.
Think about what happens when you apply a poorly cleaned patch to your face. Any leftover serum, oil, or bacteria from the last use goes right back onto your skin, sitting there for six to eight hours overnight. That’s not a skincare treatment anymore. That’s a recipe for clogged pores and irritation.
The hidden cost of neglect adds up fast. A set of quality silicone patches can cost anywhere from $30 to $80. If improper cleaning cuts the usable life from 60 uses down to 15, you’re effectively paying four times more per use. That’s real money wasted on something entirely preventable.
What most guides also overlook is the role of drying and storage in patch performance. Even if you clean perfectly, placing a damp patch back onto its plastic sheet or folding it into a bag traps moisture and creates the exact conditions bacteria love. Always follow silicone-safe cleaning guidance and pair that with proper drying before storage. The two steps work together.
The brands and communities that see the best long-term results from reusable patches are the ones who treat cleaning as non-negotiable rather than optional. It takes two minutes. The payoff is patches that stay effective for months and skin that stays clear. That’s a trade worth making every single time.
For real patch care advice that goes beyond the basics, it helps to have a system built around making consistency easy rather than relying on willpower alone.
Next-level patch care: Make cleaning easy and effective
You now have everything you need to clean your beauty patches properly and keep them working at their best. The next step is making sure your storage and drying setup supports that effort rather than undoing it.

PatchBox™ was designed specifically for this problem. After cleaning, patches need to dry evenly, stay flat, and be stored in a way that protects the adhesive surface from dust, moisture, and damage. The PatchBox Dry & Store System gives your patches a clean, ventilated space to dry completely without sticking back onto plastic sheets that can pull at the adhesive. It keeps everything organized so your routine stays consistent without extra thought. Combined with the gentle cleaning steps in this guide and a quick review of silicone safety guidelines, you have a complete care system that protects both your patches and your skin.
Frequently asked questions
How often should I clean my reusable beauty patches?
Clean your patches after every single use to prevent bacteria build-up and preserve stickiness. Cleaning after each use is the standard recommendation from both brands and beauty communities.
Can I use rubbing alcohol or bleach to clean beauty patches?
No. Both alcohol and bleach damage silicone and break down the adhesive layer. Community guidance consistently warns to avoid alcohol and bleach when cleaning reusable beauty patches.
What’s the difference between a quick clean and a deep clean?
A daily quick clean removes surface oils and serum residue after each use, while a periodic deep clean targets stubborn build-up and odor. Some guides suggest periodic disinfection every one to two weeks as a supplement to daily care.
How do I know if my patch is clean enough to use?
A properly cleaned patch should be residue-free, smooth, odorless, and show no cloudiness or leftover product. Following manufacturer guidelines is the most reliable way to confirm your patches are truly ready for reuse.