

You rinse your silicone patches, shake off the water, and leave them on the bathroom counter to dry. Seems fine, right? Most people think so. But that routine quietly undermines everything you paid for. The missing factor is not time or temperature. It is ventilation, the active movement of air that actually pulls moisture away from the patch surface and keeps bacterial growth in check. This guide breaks down exactly why ventilation matters, how it works, and the simple steps you can take at home to make every reuse count.
Table of Contents
- Why ventilation is critical in drying reusable silicone patches
- How ventilation works: Heat, humidity, and air movement
- Ventilation methods: Natural vs. active drying for silicone patches
- Avoiding common drying pitfalls: Humidity, over-drying, and case hardening
- Practical steps: Setting up optimal ventilation for patch drying at home
- What most guides get wrong about drying skincare patches
- Upgrade your patch care with a smarter drying system
- Frequently asked questions
Key Takeaways
| Point | Details |
|---|---|
| Ventilation matters most | Proper airflow is critical for drying and preserving silicone patches safely and hygienically. |
| Humidity slows drying | High humidity can make ventilation less effective, so use a dry space for best results. |
| Active drying is fastest | Fan-driven airflow significantly speeds up moisture removal compared to open-air drying. |
| Balance is key | Moderate, gentle airflow prevents surface hardening and extends patch life. |
Why ventilation is critical in drying reusable silicone patches
Most people assume that leaving a silicone patch out in the open is the same as drying it properly. It is not. Open air exposure and ventilation are two different things, and that difference directly affects how long your patches stay effective and hygienic.
When a wet silicone patch sits still in a room, the air immediately surrounding it quickly becomes saturated with water vapor. This thin, humid layer is called the boundary layer, and it acts like a barrier that slows down further evaporation. Without airflow, that layer just sits there. Drying stalls. Moisture lingers on the surface far longer than it should.
Ventilation solves this by constantly replacing that humid boundary layer with drier air. As drying phenomena research confirms, ventilation speeds drying by enhancing external heat and mass transfer. In plain terms, moving air keeps pulling moisture away from the surface before it can settle back in.
“Ventilation (airflow that removes humid boundary-layer air and supplies drier air) speeds drying by enhancing external heat and mass transfer.”
This matters for hygiene just as much as dryness. A patch that stays damp for hours is a surface where bacteria and mold can begin to develop. The faster and more completely a patch dries, the less opportunity there is for microbial growth. That is why proper ventilation is not just about convenience. It is about keeping your skincare tools safe to use on your face, night after night.
Here is what poor ventilation actually costs you over time:
- Slower drying, meaning patches stay wet longer and may feel tacky or smell off
- Reduced adhesion, because residual moisture interferes with the silicone’s ability to grip skin
- Microbial risk, especially when patches are stored before they are fully dry
- Shorter patch lifespan, since repeated incomplete drying degrades the silicone material over time
Taking ventilation seriously is one of the simplest ways to prevent case hardening in your patches and keep them performing the way they should.
How ventilation works: Heat, humidity, and air movement
With the basics established, here is how ventilation interacts with heat and humidity to create the ideal drying setting.
Drying is not a single event. It is a process driven by three interacting factors: air temperature, relative humidity, and air velocity. Each one plays a distinct role, and understanding them helps you make smarter decisions about where and how you dry your patches.
As moisture evaporation research shows, the evaporation rate depends on air temperature, humidity, and air velocity. Higher air velocity thins the humid boundary layer around the product, maintaining a stronger moisture gradient at the surface. And as ventilation engineering studies demonstrate, airflow structure affects boundary layer thickness and moisture removal, with near-wall behavior dominating performance in humid conditions.
Here is a simple breakdown of how each factor affects your patches:
| Factor | Effect on drying | Ideal condition for patch care |
|---|---|---|
| Air temperature | Warmer air holds more moisture and accelerates evaporation | Room temperature (65 to 75°F) |
| Relative humidity | Lower humidity increases the vapor pressure gradient | Below 50% relative humidity |
| Air velocity | Faster air removes the humid boundary layer more quickly | Gentle fan on low setting |
The practical takeaway is straightforward. A bathroom with high humidity and no airflow is one of the worst places to dry your patches, even if it feels convenient. A bedroom with a gentle fan running and lower ambient humidity is a far better option.
Pro Tip: If you notice your patches still feel slightly damp after a few hours, the problem is almost certainly the room’s humidity level, not the amount of time you have waited. Move them to a drier space first, then add gentle airflow.
Ventilation methods: Natural vs. active drying for silicone patches
Understanding the mechanisms paves the way for comparing the main methods for drying at home.
There are two broad approaches to drying reusable silicone patches: natural (passive) drying and active (forced) drying. Both can work, but they are not equal in performance, especially when humidity is a factor.
Natural drying means placing your patches on a clean surface and letting ambient air do the work. No fan, no device, just open air. This method works reasonably well in dry climates or during seasons when indoor humidity is low. The downside is that it is slow, inconsistent, and highly sensitive to the conditions in your home. On a humid summer day, natural drying may leave patches damp for hours.
Active drying uses a fan or a dedicated ventilated storage system to move air across the patch surface continuously. As drying methods research confirms, forced convection generally outperforms natural drying in empirical benchmarks because it provides higher, controlled mass transfer and removes moist air faster. The result is more even drying, less time exposed to moisture, and a lower risk of microbial buildup.
Here is a side-by-side comparison:
| Feature | Natural drying | Active (fan-driven) drying |
|---|---|---|
| Drying speed | Slow | Fast |
| Humidity sensitivity | High | Lower |
| Hygiene reliability | Variable | Consistent |
| Convenience | Minimal setup | Requires fan or system |
| Risk of over-drying | Low | Moderate if airflow is too strong |
To choose the right method, follow these steps:
- Check your room’s humidity. If it regularly exceeds 50%, natural drying is not reliable enough.
- Choose a dedicated drying spot away from the bathroom and kitchen.
- Use a fan on its lowest setting if you want faster, more consistent results.
- Never stack patches while drying. Each patch needs airflow on both sides.
- Allow full drying before storage. Storing a slightly damp patch is one of the most common mistakes.
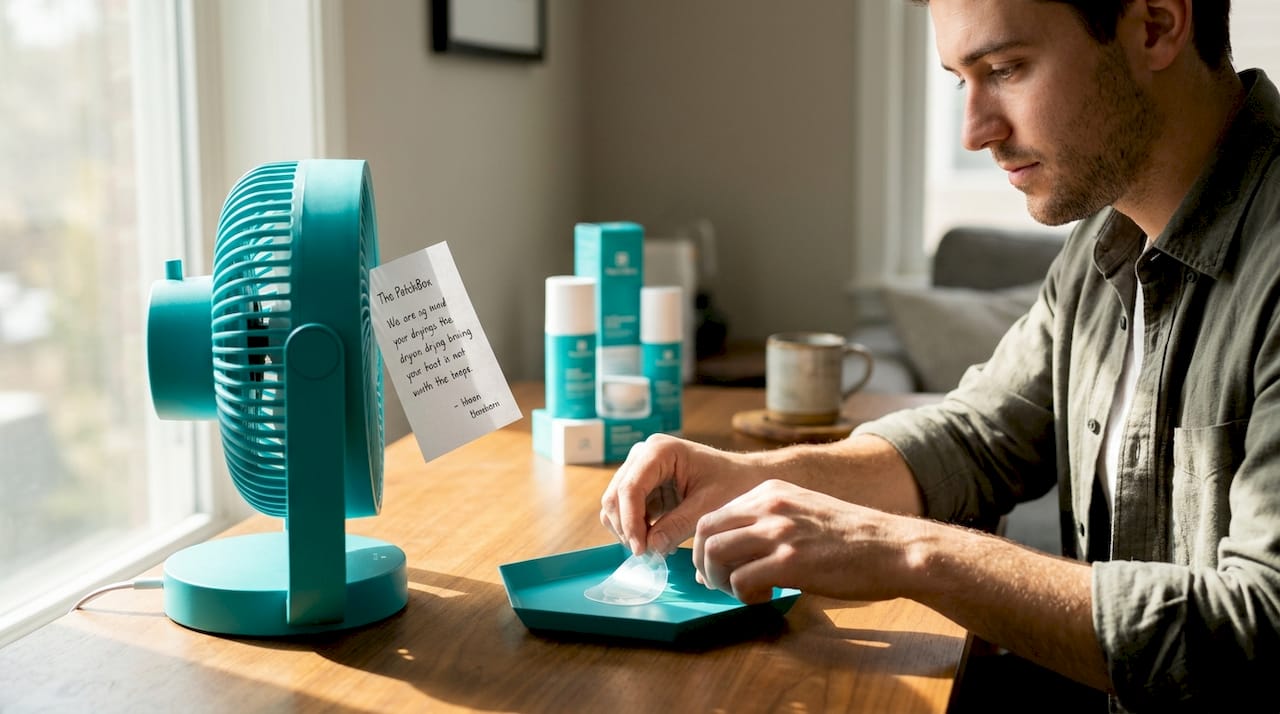
Pro Tip: If you use patches every night, set up a small dedicated drying station in your bedroom. A clean tray near a low fan creates a repeatable routine that takes seconds and protects your investment.
Avoiding common drying pitfalls: Humidity, over-drying, and case hardening
With an overview of drying methods, it is crucial to address the pitfalls that undermine proper ventilation and hygiene.
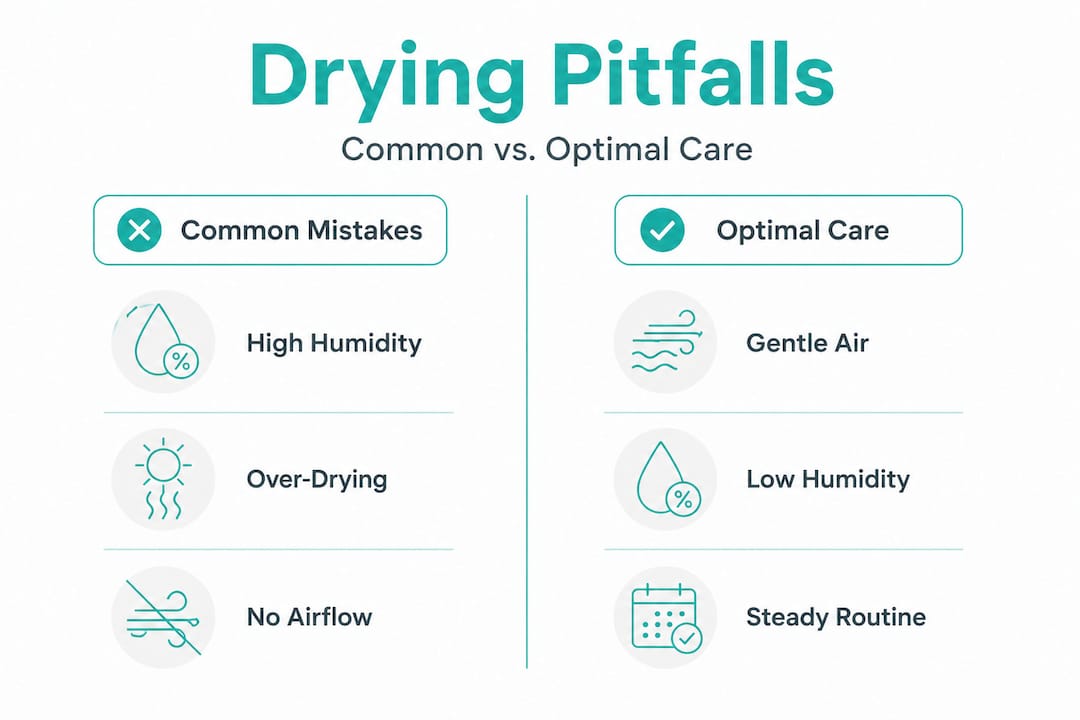
Even when you are using ventilation, a few common mistakes can reduce its effectiveness or actually damage your patches. The most overlooked of these is case hardening, and it is worth understanding clearly.
Case hardening happens when the outer surface of a material dries too quickly while moisture remains trapped inside. In food science, it is a well-documented problem in dehydration. For silicone patches, a similar dynamic can occur when you use excessive heat or very strong airflow. The surface appears dry while the interior layers of any residual coating or texture still hold moisture. That trapped moisture can degrade the patch material over time and create conditions for microbial growth from the inside out.
As drying rate research explains, ventilation is most effective during the constant-rate drying period. Once drying shifts to internal diffusion control, increasing airflow can show diminishing returns and may actually worsen case hardening. More airflow is not always better.
“If drying air is humid, ventilation can be less effective because the driving force (humidity and vapor pressure gradient) is reduced.”
This is backed by humidity-limited drying research, which confirms that when ambient air is already humid, ventilation loses its effectiveness because the moisture gradient between the patch surface and the surrounding air becomes too small to drive evaporation efficiently.
Watch out for these common drying mistakes:
- Drying in the bathroom where steam from showers keeps humidity elevated throughout the day
- Using a hairdryer or any direct heat source on silicone patches, which can warp the material and cause surface hardening
- Placing patches directly on plastic or sealed surfaces where the underside cannot dry at all
- Storing patches in airtight containers before they are completely dry
- Rushing drying with maximum fan speed, which can cause case hardening in beauty product drying and reduce patch flexibility
The fix is not complicated. Keep airflow gentle and steady, choose a low-humidity room, and give your patches enough time to dry naturally at a moderate pace.
Practical steps: Setting up optimal ventilation for patch drying at home
Having explored what to avoid, here is an easy-to-follow checklist for reliable, hygienic patch drying.
The goal is to create a simple, repeatable routine that protects your patches without adding friction to your skincare practice. Good ventilation does not require special equipment. It requires the right conditions and a small amount of intention.
As ventilation and hygiene research confirms, high humidity and inadequate ventilation create hygiene-relevant risks including condensation and microbial growth, which is exactly why ventilation and dehumidification are standard practice in environments where moisture control matters.
Follow these steps every time you clean your patches:
- Rinse patches gently with lukewarm water and a mild, fragrance-free cleanser. Avoid scrubbing.
- Pat lightly with a clean cloth to remove surface water. Do not rub.
- Place patches on a clean, open surface where air can circulate on both sides. A drying rack or ventilated tray works well.
- Position a fan nearby on its lowest setting. You want a gentle, consistent breeze, not a wind tunnel.
- Choose your room carefully. A bedroom or dry living space is ideal. Avoid kitchens and bathrooms.
- Allow at least 30 to 60 minutes of open-air drying before storing.
- Store in a clean, dry container with some airflow. Avoid sealed plastic bags.
Pro Tip: If you live in a humid climate or notice your home feels sticky in summer, a small portable dehumidifier in your bedroom can make a significant difference. Keeping the room below 50% relative humidity turns any spot into an effective patch-drying zone.
What most guides get wrong about drying skincare patches
Most articles about caring for reusable silicone patches focus on the cleaning step and then treat drying as an afterthought. Rinse them off, let them air dry, done. But that advice misses the most important variable entirely, which is the relationship between airflow and the environment it operates in.
Here at PatchBox, we have seen the results of aggressive drying routines. Patches that are blasted with high-speed fans or left near heat vents develop surface stiffness much faster than patches dried gently. The silicone loses its subtle flexibility. The adhesive quality diminishes. Users assume the patches have simply worn out, but the real cause is a drying method that prioritized speed over care.
The uncomfortable truth is that more ventilation is not automatically better. The right amount of airflow depends on the humidity in your room, the stage of drying the patch is in, and the temperature of the air moving across it. A gentle fan in a dry room outperforms a powerful fan in a humid bathroom every single time.
There is also a hygiene dimension that gets ignored. People sometimes think that as long as a patch looks dry, it is safe to store. But visible dryness and complete moisture removal are not the same thing. A patch that dried too quickly on the surface may still harbor moisture in its texture, creating exactly the kind of environment that encourages bacterial growth over repeated uses.
Smart, environment-aware ventilation, meaning gentle airflow in a low-humidity space with enough time for complete drying, extends both the life and the performance of your patches in ways that no cleaning product can replicate.
Upgrade your patch care with a smarter drying system
You now know that the difference between patches that last and patches that disappoint comes down to how they dry. Gentle airflow, low humidity, and the right surface make all the difference.

PatchBox was built around exactly this insight. The PatchBox Dry & Store System gives your silicone patches a ventilated home between uses, so they dry evenly, stay hygienic, and hold their adhesion use after use. No more sticking them back onto plastic sheets that trap moisture underneath. No more guessing whether they are dry enough to store. Everything about PatchBox is designed to match the patch safety standards your skin deserves. If you take your skincare seriously, your drying routine should match that commitment.
Frequently asked questions
Is airflow actually necessary for drying silicone patches?
Yes, moving air removes moisture faster than stagnant air by continuously replacing the humid boundary layer around the patch, and it significantly reduces the risk of bacterial growth. As drying research confirms, ventilation speeds drying by enhancing heat and mass transfer.
Can I let my patches dry in the bathroom after cleaning?
Drying in bathrooms is not recommended because the consistently high humidity slows evaporation and may encourage microbial growth on the patch surface. Ventilation research confirms that elevated humidity creates hygiene risks including condensation and mold.
Does more airflow always mean faster or better drying?
Not at all. Excessive airflow can cause surface hardening and may not improve drying once the outer layer is already dry. Key drying rate findings show that increasing airflow can produce diminishing returns or even worsen case hardening in later drying stages.
Should I use a hairdryer or heat source on my silicone patches?
Direct heat can warp silicone, accelerate surface hardening, and degrade adhesion. Always use gentle, ambient airflow at room temperature instead.
Is there an ideal spot in my home for drying patches?
Choose a dry, well-ventilated room such as a bedroom with a fan on its lowest setting, and avoid any area prone to steam or moisture like bathrooms and kitchens.